Wednesday, February 29, 2012

Tutorial: Floppy disk coasters!


Phew! What a packed past week it was-- unexpected, but a very happy week for me that put February 2012 on top my favourite months so far this year for me. Some lovely things happened to my Etsy store, and I'm very very thankful for God's blessings. I'll share those stories in another post, coz I'm so excited to share this tutorial with you first! 


Who misses floppy disks?? Ok not me, because there's not much data you can keep in it (my husband has this story of his teenage years, and boys being boys, you can guess what they passed around in school in stacks of floppy disk. Anyone? Haha).

But, I love me a good old school flava (checkout how I spelled flava). In fact, for our wedding bands, my husband and I decided to have binary numbers that spelled out our initials, and we got them made by a wonderful silversmith-- Lyndsay of Idle Hands Designs. So floppy disks will always have a charm to us!

Anyway, HEY. Let's do this whole tutorial in Courier.

Ready to make your own floppy disk coasters?

Insert disk into Drive A:


You will need:
Colourful felt
Cork coasters (I recycled my old ones)
Glue
Scissors
Pen & Paper


First, trace the shape and size of your coaster onto the paper.


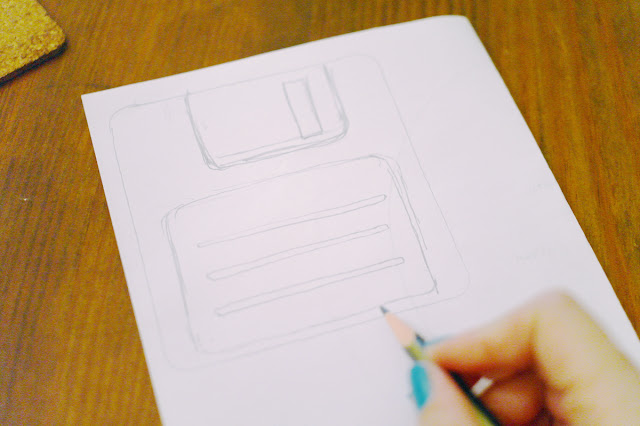
Roughly sketch out the parts of the floppy disk. 
You will need a label at the bottom, and the metal flap that protects the actual disc on top. I have no clue what is it called, but you know what I mean. That flap thingy.


Cut out your felt pieces according to the pattern you sketched earlier.


Glue all the pieces onto the cork coasters.


Cut some narrow strips to create the lines on the label.


Hurrah! Mission accomplished!


Now to check what files are in these floppy disks...


p/s: Hello new readers! My blog is now at http://chingmakesthings.blogspot.com :)

Monday, February 20, 2012

Excited, nervous, but I guess mostly excited! Ok maybe more of nervous.


Check out the new collection @ L.A.R.K


Hello new followers! Thank you for following my blog! \ :D /

I've been keeping busy with the Etsy shop. Am going to send off something to France tomorrow, how exciting it is to be writing an authentic French address on an envelope! (cheap thrills haha) I haven't been getting a lot of sales online (some of the sales are offline sales)-- if anyone has any tips for promoting and marketing an Etsy shop, do leave a comment, I'd appreciate it heaps.

Listed some new faux leather jewelry today. Had so much fun making them. I really do love the burst of colours and shapes!

Speaking of jewelry, I have an appointment coming up to meet with a retailer. It's my first time meeting a retailer and letting them have a look at my jewelry, and frankly I am quite nervous. I will be bringing key pieces from the faux leather collection, as well as my portfolio (photographs of other jewelry that I've done throughout the years). It did cross my mind to cancel the appointment and chicken out because of the fear of rejection, but HEY! Why am I being such a wuss? So I shook myself a bit (mentally) and slapped myself (mentally) and vowed to put my best foot forward and just DO IT. After all, if anything, it would be nice to have that experience of meeting with a retailer-- another new thing to learn in my lifetime.

I recently bought a domain (I think it happened at 4am, and no I wasn't drunk lol) and am going to start my own online store in the next few months. First, I've got to continue building the inventory... The current plan is to sell a mix of ready-to-wear, digital sewing patterns, as well as handmade jewelry and possibly some items for the home too.

Meanwhile, the husband and I are also planning for our home renovation. Been putting it off for way too long :-S  My mom and I are going to embark on some reupholstery projects, SO EXCITED! We have a lot of great old sturdy furniture in this house that have been here for 25 years... My late mom-in-law picked them and she's got good taste. (Sidetrack: My father-in-law said when they both got married and bought this house, they only had enough money for one sofa, so the house was pretty empty for quite some time. That story still makes me smile because it's pretty romantic.) I've never really worked with furniture before, so this chance to refurbish some pieces is terribly exciting that I keep using the word excited. Heh.

I will be posting up a tutorial soon, and this time it's something for the home! Come back soon ok! :D

/waves


p/s: Oh! I'm having a giveaway again :D Superrrr easy. Just "Like" L.A.R.K on Facebook and you'll be automatically entered into the lucky draw for this Mini Monolith ring inspired by the ancient pyramids. Ends March 15, 2012, so do spread the word!

Friday, February 10, 2012

Just do it!

When I don't know something, I read up about it. If reading doesn't help me, there's really no way around it except to JUST DO IT.


Which is what drove me to work on the following sewing projects-- a pencil skirt with a back vent, and a pair of loose capris. 

Looking at one of my favourite skirts I thrifted from a shop, I was deeply enthralled by the back vent. Okay maybe deeply enthralled is too strong a term HAHA, but yeah isn't the back vent of a skirt an amazing thing? It allows the skirt shape to taper down the thighs to create curves while still allowing you to walk like a stomping giant, ie Godzilla.

Picture from examiner.com
Gojirra in search of the perfect pencil skirt for outings such as today's.


Hence I drafted this pencil skirt, and used a tutorial on Burdastyle to add the vent:


I'm also super happy this skirt turned out well because it was my husband who took my measurements :-) Before this I took my own measurements, but I think it's better to have someone else take it for you so the posture isn't compromised.

Thanks husband for taking such accurate measurements! <3

And as for the loose capris, if there's one thing that I'm deeply terrified of (other than cockroaches), it's probably sewing a zipper fly. It got me to thinking that most of the time we are terrified of things that we don't understand. Whilst I am not really looking forward to understand cockroaches, I decided maybe it's time I suck it up and learn how to assemble this zipper fly thingamajig. 

Deep thinker pose

And what better way to learn than to use a pattern from a magazine, right? Well sorta right, unless the magazine is in a language you don't understand.

........ erm... konichiwa... ?

Anyway, I adore almost everything Japanese, and one of the things I love most about their craft and sewing books is that when they get down to the step-by-step er, steps, their illustrations and photographs are so detailed you almost do not need the accompanying words to understand. Almost. Hehe.


Check out my scribblings. Why I even tried to re-write the Japanese words is beyond me. LOL

I traced the pattern in M size, and made some adjustments after sewing the legs up (love the crotch curve on the pattern btw). I sewed in the waistband, and realized it was too high for my liking, so I changed it into a thin waistband. It was very frustrating and fiddly, and obviously so because straight waistbands are usually meant for garments that sat on the natural waist, but these pants didn't! Ha, what am I doing!! Lol. Anyway after wrestling with the waistband I got it to (somewhat) behave. Austin Powers would be proud of me.

Pic from videogamecentral.com


Also finally got to learn how to use the buttonhole function on my machine! Ah the machine manual, it's a keeper isn't it (I usually throw manuals into the abyss of a cardboard box).

 Think it goes well with my necklace too, soon to be added to my Etsy shop!

Sans tuck in for a slouchy look

Overall the capris turned out okay, and as my goal was to learn how to assemble a zipper fly and buttonholes, as Ethan Hunt would say, "Mission.... ACCOMPLISHED!" 

And with that... おやすみ :-)


p/s: Fine fine, I used Google Translate for those Japanese words. 

Tuesday, February 07, 2012

Tutorial: Thread spool holder


I'm so grateful to Craft Gossip for sharing my freezer paper tutorial & stencil on their blog! Since then I've gotten a few visitors from Kenya, Australia, Sweden, and I'm excited to share my projects with you guys as well as be inspired by yours :D

I was looking around my desk the other day and saw my thread "organizer". Well it's actually just a basket hahaha. While it may look nice when I arrange them so that they are all standing up, the truth is most of the time the look like a violently tossed salad.


A violently tossed salad.

I've seen a few nice thread spool organizers online, and thought hey maybe I should try making one myself. And I think they look so much more organized now, left with hardly any room to mess up :P


Good morning ma'am, how may we serve you today?


And it's super easy to make it!


Get:
- A thin wooden chopping block that will roughly accommodate all your thread spools
(You can recycle your old one by disinfecting it first, or use other alternatives like a photo frame with the backing attached, or wooden door plates which can also be found cheap. If you have any other ideas for alternatives let me know!)
- Wooden dowels from the hardware store
- A very strong glue like Liquid Nails or 5-min Epoxy (love that stuff)
- Spray paint

Let's go!

Spray the chopping board, as well as the dowels. Spray thin layers to get an even finish.
Be patient and watch the paint dry. Just kidding, that's really boring, go and watch some NCIS or something heheh.

Alternatively, you may also spray paint it right at the end, up to you ;-)


Mark dots onto the chopping board, 1 inch apart. I had 28 dowels, so I centered 7 x 4 rows of dots.


Stick the dowels down onto the marks! Allow for time to dry according to package <--- another boring-but-you-have-to-do-it-grudgingly-thing.


Once it's dry, you're done! The beauty of this is that it can sit flat on my desk, or be hung up on the wall. Remember to use very strong glue (UHU just doesn't cut it this time, and I actually still very much prefer the 5-min Epoxy), and also at the same time that there are limits to how much weight these dowels can take. Alternatively, you can hammer nails in if you've got excellent hand-eye coordination (I don't. Just sayin...).

What do you think?

p/s: Hello new readers! My blog is now at http://chingmakesthings.blogspot.com :)

Saturday, February 04, 2012

On Sale Now: Printable stencils!


One of my dreams is to design my own fabric soon! Before I can afford to do that, painting on fabric makes me a happy creature. And what better way to keep things looking uniformed than with stencils? 

If you liked the previous honeycomb stencil I shared, you may like these too. I've kept the price at a minimum, so all you have to do is print, cut and paint :D Oohh plus you can totally use these stencils for your own handmade items to sell :-)

Give them a hoot over at my Etsy store